
(7) comments
Add Your Reply
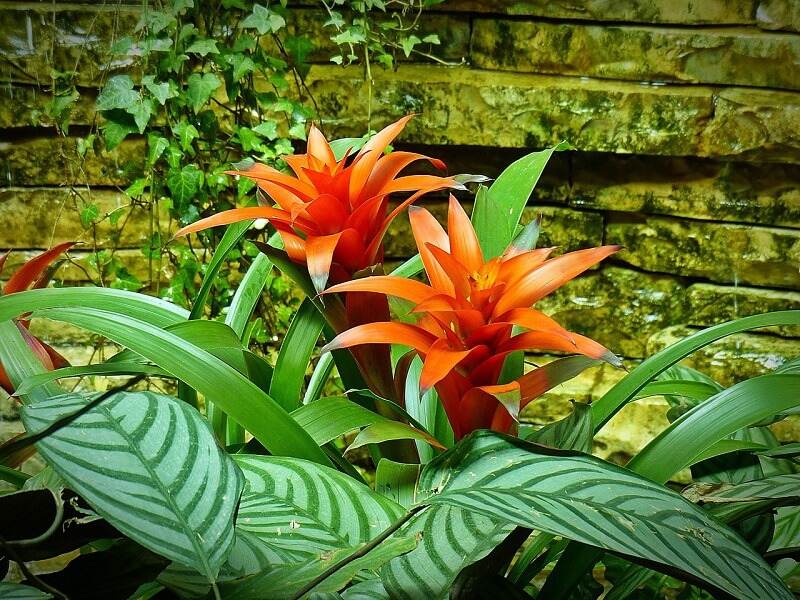
A bromeliad tree can be used to display rainforest plants indoors, given the right light and humidity. They can be attractive and are fairly easy to make.
Bromeliads are a very diverse range of plants which occur most commonly as tropical rainforest plants. Most are foliage plants but they also include the air plants that have no roots. Many bromeliads grow as epiphytes, clinging to trees and in their natural form, they grow in a humid atmosphere with no direct sunlight.
Many of Bromeliad plants can be grown as houseplants and used decoratively if the right growing conditions can be maintained. Depending on the species, there are many options available. One of the most common and more effective methods is to create a bromeliad tree or bromeliad log on which to position and nurture the plants.
Bromeliad will grow in temperate gardens as well as the tropics or subtropics but many people are discouraged by the misconception that they are difficult plants to grow in the garden. Knowing a bit about the different varieties helps gardeners in selecting suitable ways to take care of bromeliad indoors or outdoors. Armed with this knowledge and the hints given below a temperate garden can become a tropical paradise.
Bromeliads are shallow rooted plants. Some of them are epiphytes, found growing epiphytes bromeliads naturally in the branches of trees or on fallen logs on the forest floor. Many of these are the tillandsia, also known as air plants.
Bromeliads require sharp draining soil and do not like to sit in damp soil or they are likely to rot.
The bromeliads which are being attached to the branch should have their base wrapped in the dampened moss. Some care should be taken as the roots, where they exist, are usually light and delicate.
Bromeliads grow well in pots which can be moved around the garden to show them off when they are flowering. As they do not need much soil there is no worry about the roots out – growing the pots although they will need thinning out from time to time.
Plant epiphytic Bromeliad on the trunks of trees by tying them on. Old stockings are good for this. Choose a tree that has a coarse bark which the bromeliad will be able to cling onto as it matures, or use the fork of a branch. Tree ferns are good host plants for epiphytic bromeliad.
A forked branch is often best, which also allows the more striking plants to be positioned in the fork of the branch. A piece of bark or small piece of driftwood is suitable for a small display.
In some cases, using a light plastic mesh through which the roots can be pushed and tied on, can be a suitable alternative. In many cases, the wire can be removed later when the plants have established themselves.
Do not let new plants get disturbed by wind or pets, they may need some protection or staking.
Snails love hiding in the center of the leaves and may eat the emerging bud so use a good snail bait.
After a few years, plants will need a good tidy up. After the plant has flowered, use a sharp knife to remove the old flowered leaf rosette from the rest of the plant. Make the cut below the leaves on the stem.
Look for any emerging young “pups” and be careful not to cut them. Do not thin out Bromeliads if there are less then two new rosettes of leaves, or pups.
With big clumps of bromeliad it is possible to get new plants by gently cutting out a pup to plant elsewhere.
Some of the flowers on bromeliad last for a long time. Once the flowers have died, cut the old flower stalks off and thin the plant out (as above) if it is big enough.
Most types of bromeliad need to be fairly well-lit but should not be placed in direct sunlight. Once created, if the growing conditions are adhered to, bromeliad displays such as this make very interesting feature houseplants such as the tillandsia.
Temperatures for most bromeliads have to be maintained at a minimum 50F.
Bromeliads will not cope with frosts and are really only suited to temperate, subtropical and tropical gardens. For gardeners in cooler climes all is not lost, bromeliad make great houseplants.
After seating and securing the tree branch in the container and leaving the medium such as Plaster of Paris to set, the plants can then be positioned. Foliage plants can be included by wrapping their base in sphagnum moss or bromeliad compost if they are to be seated in the pot around the tree display.
By misting the plants initially then misting them on a usually weekly basis, their humidity can be maintained. Some bromeliads have cup-shaped centre into which water can be poured to enable the plant to absorb it.
The center vase of leaves needs to be kept full of clean water.
Don’t let the water in the central vase of the plant stagnate, replace the water regularly or it will be a breeding ground for mosquito. If mosquito do become a problem pour a weak solution of detergent, disinfectant and ammonia into the rosettes to kill any larvae.
Bromeliads such as the air plant, Spanish moss, which is ideal for draping along branches, require no watering as it absorbs moisture from the air.
There are two ways of propagating bromeliads. New plants can be created by separating offsets from the host plant or buy planting seeds. Creating new bromeliads through offsets or “pups” is probably the best and fastest way.
A wonderful aspect of bromeliads is that they create more plants. “Pups” or offsets sprout from the side and base of the mother plant as the plant blooms. Harvest the pups when their bases have become firm, which is usually after the mother plant has bloomed and the flower has died.
To separate the pups from the mother, take a sharp, clean knife or pruning shears and cut between the host plant and the offset. Place the new plant in the proper medium such as potting soil, perlite or other well draining material. Remember not to place the new plants in soil that is too wet as the plant will likely rot. In addition, do not place the plant too deep. The new plants may require some support until they can develop their own root system. Popsicle sticks can be used as stakes to support the new plant. The pups should bloom in one to three years and begin to produce additional plants.
Plant bromeliad to get that tropical look in the temperate garden. They will reward the gardener with amazing flowers and /or leaves and can be propagated by removing the small “pups” that grow, usually after flowering. Bromeliad can fill the garden from top to bottom, hanging from trees or lightening up a corner under the trees.
