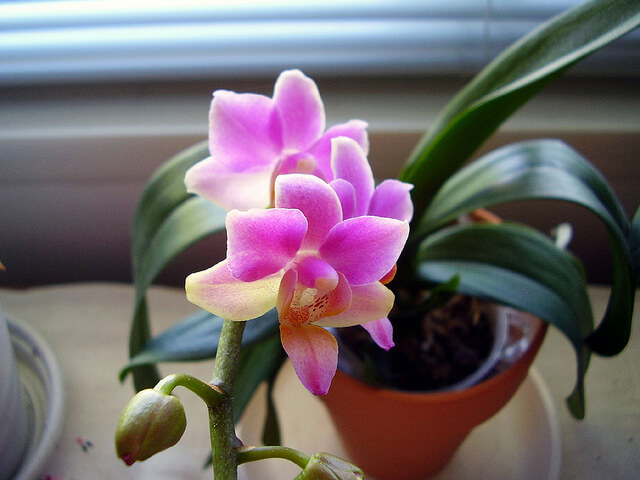
Did you know that you can grow orchids indoors? Yes, it is possible, and in fact, it is not very difficult. For a higher success rate and to enjoy these ethereal blooms longer, here are some tips on how to grow and care for orchids indoors.
Light is one of the most important factors that orchids need. Remember that orchids like Angraecum and Vanda prefer high, unobstructed light. Therefore, you must place them near a south-facing veranda or window for your orchids to enjoy at least 6 hours of early sun.
If you prefer Oncidiums, Phragmipediums, and Dendrobiums, make sure that they are in a place where it is bright but is not under direct sunlight. Jewel orchids, on the other hand, thrive best under low light.

Orchids are generally grouped in three categories when it comes to temperature. There are orchids that grow well in a cooler climate, while some do better in a warm place. Nonetheless, as with lighting, some orchids can easily adapt to temperature change.
Before choosing orchid species, check the temperature range in the location where you plan to place your orchid. If the temperature in your house stays low, then pick from Odontoglossum, Cymbidium, and Masdevallia. For warmer temperatures, it is best to have a moth orchid, a Vanda, or an Angraecum.
Most orchids require a humid environment because they usually come from the tropics. To have a better growing environment for your orchids, boost the humidity level in your indoor growing area. This can be done by grouping a number of plants together. You can also place the potted plants on a dry well. You can make a dry well by placing some pebbles on a shallow tray and pouring water just above it.
The proper way of watering orchids depends on the type of orchid you have and where it is placed – a clay pot or a plastic pot? Generally, the goal here is to get as much water to the mix particles as possible. For orchids in a clay pot, the trick is to dip the pot in water for about 15 minutes. Lift the pot out afterward and drain excess water before returning the pot back into its place.
For orchids in plastic pots, you can also soak them in water but make sure not to put them in a bowl that is already filled with water. Doing this will cause water to push the plant bark up. Instead, place the pot in a bowl then pour in water. Take note that the water should be just below the pot lip. As with a clay pot, you have to soak plastic-potted orchids for more or less 15 minutes, drain, and put it back into its place. There are several factors that affect how frequently you should water your orchids. These include:
Generally, Cattleyas, Dendrobiums, Oncidiums, and other drought-resistant species need watering every week. Other kinds of orchids like Paphiopedilums, Miltonias, and Phragmipediums would need watering every 4 or 5 days. This could be adjusted accordingly depending on the temperature and humidity levels in your home. Remember to wait until the orchid is thoroughly dry before watering it again.
Consider growing orchids under artificial light if windows with appropriate light are not accessible. Four 4-foot-long fluorescent bulbs set side by side, 6 inches apart, should enough. Two cool-white store lighting fixtures will suffice. Special grow lights, marketed under numerous brand names, are significantly more costly and provide a wider spectrum of light. Although studies on this is inconsistent, grow lights may produce greater outcomes. Plants should be around 6 to 8 inches below the tubes. Set the lights on a timer to turn on for 14 to 16 hours each day. Phalaenopsis and paphiopedilum orchids, for example, will be happy. Vandas and cymbidium orchids, on the other hand, require natural sunlight or high-intensity discharge lamps to blossom. A fluorescent bulb in a dimly lit window provides additional light to natural sunshine, which can be the difference between flowers and no flowers. Non-flowering orchids may demand more light.
Orchids do not require a lot of fertilizer. Apply a mild solution of 20-10-20 fertilizer once a week to keep your plants healthy and observe blooms on a regular basis. Water with plain water once a month to wash off any stored fertilizer salts. Dilute the fertilizer to a fourth of the suggested strength on the box. Give less rather than more when in doubt. In the autumn, when many orchids are forming flower buds, switch to a blossom-booster fertilizer. A fertilizer ratio with higher phosphorus and lower nitrogen, such as a 10-30-20 mix, is known as a blossom-booster. Many orchids bloom in the winter, making them even more unique as houseplants. In the drabmest of months, they fill an otherwise flowerless emptiness. The best time to see orchids is between December and April.
Humidity is something orchids like a much. Fifty percent or more is required, but most houses, especially those with dry, hot-air heating, fall well short. Orchids will blossom better if the humidity surrounding them is increased. Some suggestions for increasing humidity: Place the pots on flat, black pebbles set in a tray with water until it almost covers the stones (“Egg crate,” a lattice-like plastic grid sold in hardware stores for suspension ceiling lights, is a good, more steady alternative to the pebbles. ); group the orchids together; or cordon off the growing area with clear plastic (but continue to provide ventilation to prevent bacteria from becoming a problem).
By following these simple principles, in no time at all, you will be an expert in growing orchids indoors and giving them the proper care they need.