Menu
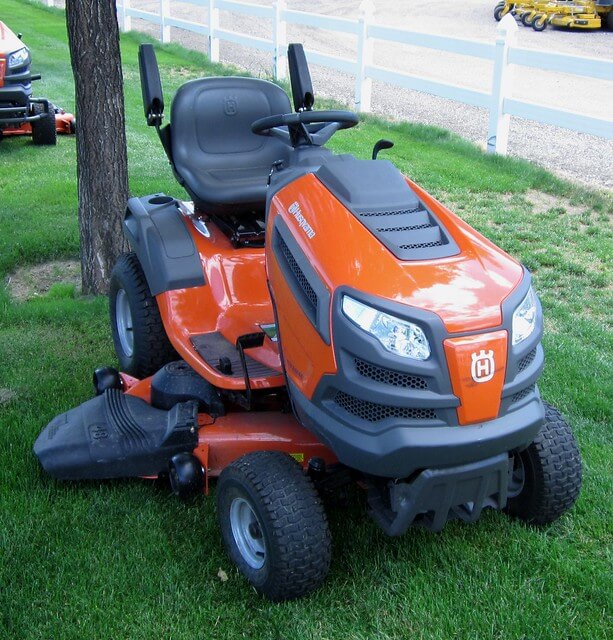
Today we’re going to put this deck back on to my Husqvarna 2246LS riding mower. The reason I had taken this off last fall was because this bracket had come off the deck.
Its weld had failed so I have a welder, but I’m not a very good welder so I ended up taking this to a shop to have it done sort of professionally. There’s a decent bead on it now, there’s actually a bead on the other side too and they put a little paint on to cover up the bare metal.
So the first thing that I’m going to do here before I put the deck back under the mower is that I’m going to reroute the belt on here. You may be able to see that there is a routing diagram on the front of the deck. So we’ll just follow that for how the belt should go around the pulleys.
Next thing is that I’m going to take this Torx T30 screwdriver, and loosen the screws that hold these plastic shrouds down, just to make it a little easier to get the belts in there.
And as you can see, we didn’t need to take the thing all the way off. I just need to loosen it enough to kind of lift it and provide some room for the belt to slide down behind the pulley. It’ll be the same thing over both sides.
Now I’ll finish up routing the belt. It is going to go around this idler pulley and there are just some metal tabs here. They’re gonna have to move out of the way temporarily to get this on all over the deck.
This belt just kind of wraps around this pulley. Now we’ve got a little bit of a twist and it should be good to go.
Read more: How Often To Sharpen Mower Blades
Next up I’m going to reinstall this spring that connects the idler arm to the deck and provides tension on the idler pulley. First, take this end of the spring and hook it around this hole that’s in the idler arm. Then orient it so that the hook is sort of facing up and the body of the spring is mostly below the arm itself.
What you should do next is stretch the spring out and hook the other end around this hole in the edge of this bracket. It looks a little funny over here but once this is tensioned up and the belt is in place, this will straighten out and be okay. So what I’ll do now is make sure both of these brackets are swung forward so they’re not in the way and we’ll slide this under the machine.
Let’s take a close look underneath the left side of the machine that would be the side on your left, if you’re sitting on it writing it. The first thing is pulling that cotter pin out of the way. Next up, bring this bracket up and give it up the pivot point. I had to slide the deck a little bit forward there to line everything up.
Now continue to put the pin back in and reinstall the rod with this sliding end on it. But before doing that, pull this safety pin out of the way. Then make sure the deck height level is all the way down so the deck would be at its lowest position.
Take the bent end of the rod and work it through the hole that’s in the lever attached to the deck height control. Then we’ll pull this washer out of the way, lift the deck up a little bit and get that kind of on the pin.
I’ll bring the washer back and then reinstall the safety. So now we’re over on the right side of the machine and looking at the back of the deck, there’s another safety pin here that needs to be removed.
Now we’ll pull this washer and set it aside. Next up, I’ve got this rod that you can’t see the other end of because the wheels in the way. But this is bolted on the machine with a lock nut. So I didn’t remove this when I took the deck off. I just let it hang there it was sort of out of the way. So this next thing is a little tricky but we’re gonna try and pivot this over.
We’re gonna pull this safety pin out and just like on the other side we’re gonna bring this bracket up. Give it in place, get it over that pin and then put the safety pin back. Take a look under the front of the machine at the front of the deck and we’re gonna reinstall this rod here.
Again, pull the safety pin off of that rod, then fish the bent end of it through this hole that’s in the bracket. Next we’re going to turn it around so that the bent part of it is sort of facing the right side of the machine. And we’re gonna put this through the hole that’s in the front of the deck behind the front wheel.
I’ll pop the safety pin back on the end of this rod here and that should do it. Now get the belt mounted to the main engine pulley. Before I loop that around the pulley, I’m going to check and make sure the belt is still routed the way it’s supposed to be on the deck. And also make sure that it didn’t twist or anything like that.
I hope that you can follow these guide easily on how to level a Husqvarna lawn mower deck. It can be a little difficult at first, but just keep calm and do things step by step. Please leave a comment below if you have any new ideas for this kind of mower deck.