Menu
Trimming a spider plant, also known as Chlorophytum comosum, is a simple yet essential part of maintaining its health and aesthetic appeal. Known for its arching leaves and small, spider-like offshoots, the spider plant is a popular houseplant that can thrive with minimal care. However, regular trimming helps keep the plant in optimal condition, encouraging lush growth and preventing potential issues.
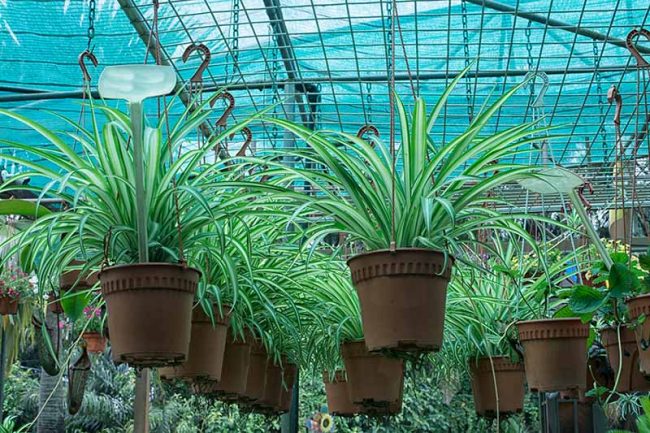
Spider plants are beloved for their ease of care, making them a staple in many homes and offices. With their bright green or variegated leaves, spider plants can add a touch of natural beauty to any space. Understanding how and when to trim a spider plant is key to ensuring it remains vibrant and healthy.
Trimming is essential for spider plants, not just for aesthetic reasons but also to promote overall plant health. By removing dead or damaged leaves, you allow the plant to redirect its energy towards new growth. Additionally, trimming helps manage the plant’s size, especially if it’s outgrowing its space.
Timing is important when it comes to trimming your spider plant. While spider plants can be trimmed at any time of the year, the best time to do so is during the growing season, typically in the spring and summer. During this period, the plant is actively producing new leaves, and trimming encourages even more vigorous growth.
Signs that your spider plant needs trimming include browning leaf tips, yellowing leaves, or an overall leggy appearance. If you notice the plant producing numerous spiderettes (the small baby plants that dangle from the main plant), it might be time to trim these off to encourage the parent plant’s health.
Having the right tools is essential for a successful trim. Pruning shears or sharp scissors are the best tools for the job. Ensure they are sharp enough to make clean cuts, which will help prevent damage to the plant tissues.
Before trimming, it’s crucial to clean and sterilize your tools. This step prevents the spread of diseases and pests between plants. You can sterilize your tools by wiping the blades with rubbing alcohol or a diluted bleach solution. This simple step is often overlooked but is vital for maintaining plant health.
When trimming your spider plant, start by assessing the plant’s overall condition. Look for leaves that are brown, yellow, or damaged, as these should be removed first. Gently pull or cut these leaves close to the base of the plant. Removing dead or discolored leaves not only improves the plant’s appearance but also prevents the spread of potential diseases.
Next, trim any overgrown or leggy stems. Spider plants can become top-heavy, with long stems that may cause the plant to droop. Trimming these stems back will help maintain the plant’s shape and encourage more compact growth. Cut back the stems just above a leaf node to promote new growth.
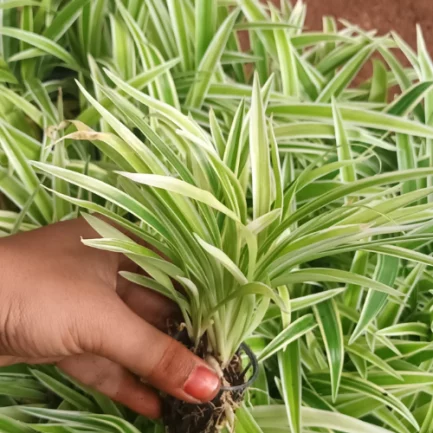
If your spider plant has produced spiderettes, you can trim these off as well. These baby plants can be left to grow if you prefer a more natural look, or they can be trimmed off and propagated to grow new plants. Cut the spiderettes from the main stem, leaving a small stem attached to the baby plant for easier propagation.
Trimming your spider plant for shape involves more than just cutting back overgrowth. Aim to maintain a balanced, symmetrical appearance. This might involve selectively trimming some leaves and stems more than others to create an even, bushy look.
Proper pruning can also encourage fuller growth. By cutting back longer stems, you signal the plant to produce more leaves at the base, resulting in a denser, more attractive plant. Regularly trimming your spider plant will keep it looking neat and prevent it from becoming too leggy or sparse.
After trimming, your spider plant will need some extra care to recover and continue thriving. Water the plant thoroughly after trimming, ensuring the soil is evenly moist but not waterlogged. This helps the plant recover from the shock of trimming and supports new growth.
Light and humidity are also important considerations post-trimming. Spider plants prefer bright, indirect light, so place the plant in a well-lit area away from direct sunlight. If the air in your home is dry, consider increasing humidity around the plant by misting it or placing it on a tray with water and pebbles.
While trimming is beneficial, it’s important not to overdo it. Over-trimming can stress the plant and slow its growth. A good rule of thumb is to avoid cutting more than one-third of the plant’s foliage at any one time. If you accidentally trim too much, give the plant time to recover by providing optimal care and avoiding further trimming until it shows signs of new growth.
Another common mistake is failing to sterilize your tools. Dirty tools can introduce diseases that may harm your spider plant, so always clean your pruning shears or scissors before and after use.
Finally, watch for signs of stress after trimming. If your spider plant begins to wilt or the leaves turn brown, it might be reacting to the trim. Ensure the plant is receiving adequate water, light, and nutrients to support its recovery.
Regular trimming offers numerous benefits for your spider plant. It promotes healthier growth by removing dead or diseased foliage, which can otherwise sap energy from the plant. Trimming also helps prevent pests and diseases by improving air circulation around the leaves and reducing hiding spots for insects.
Moreover, regular pruning keeps your spider plant looking its best, maintaining a tidy, attractive appearance. Whether you keep your spider plant in a hanging basket or a tabletop pot, trimming will ensure it continues to add beauty to your indoor space.
Trimming a spider plant is a vital practice for maintaining its health and aesthetics. By regularly removing dead or damaged leaves, managing overgrowth, and addressing spiderettes, you can encourage lush, vibrant growth and a well-balanced appearance. Proper timing, using the right tools, and following a step-by-step approach ensure a successful trim that promotes overall plant vitality. Post-trim care, including appropriate watering, light, and humidity, helps your spider plant recover and thrive. Avoid common mistakes like over-trimming and neglecting tool sterilization to keep your plant in top shape. With these tips, you can enjoy a beautifully manicured spider plant that continues to enhance your indoor space.
