Menu
Directions how to lift, divide, dig & save gladioluses for planting in your flower garden next year to increase and grow more of your favorite varieties or save money.
By any name — gladioli or gladioluses or gladiolas or simply glads — these wonderful flowers are worth saving from year to year. Cold climate gardeners must dig and store the corms (bulbs) each fall to preserve them for planting the following year.
Warmer climate gardeners still need to lift, divide and replant the corms every few years when they become crowded. By digging, sorting and storing the corms, you can also reduce pest and disease problems as well as propagate your favorite gladiolus using the little cormels or cormlets. Follow these how-to tips so you know what to do.
For the best regrowth of corms, you have to allow the foliage to grow as long as possible. When its flower finished blooming for about 6-8 weeks, or until the first frost passed and right before the ground freezes, start digging up the corms in a gentle way. You can classify them by variety and mark label.
Just leave the husks on the corms alone. To prevent further rotting and diseases, cut the stems off and throw them along with soft, discolored corms away.
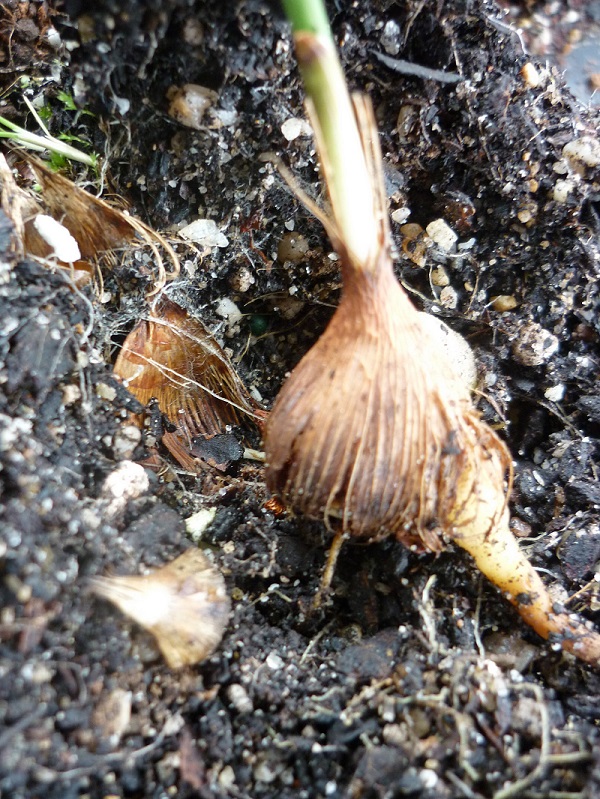
Each dug plant will have a new corm (technically it is not a bulb) that has formed along the stem above the old one. The old corm will be dried up and shriveled. There may be little baby cormlets or cormels, too.
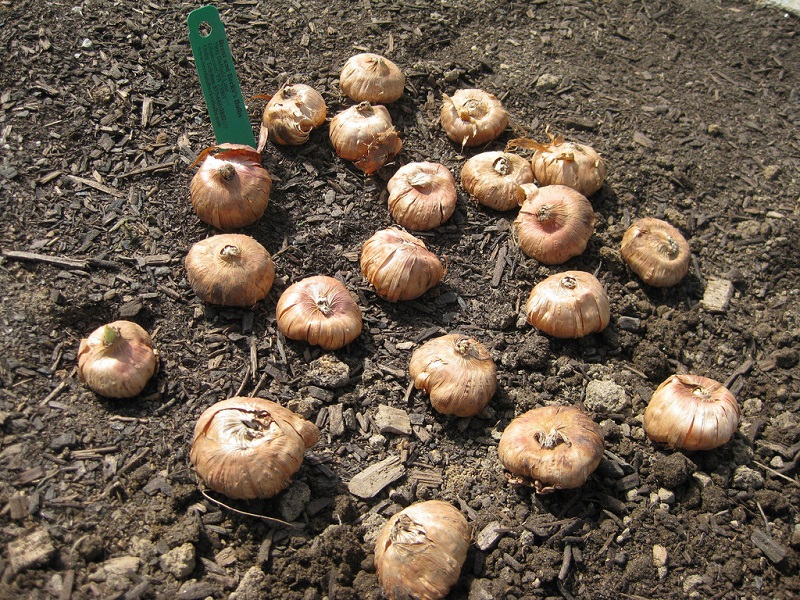
Shake off the dirt or rinse the corms clean. Air dry in a single layer in a warm (65 degrees is good) and dry, airy place for about two weeks.
Once the shriveled old corms can be separated easily from the new corms, break off the old corms and throw them away.
Leave the tighter husks on the new corms. Dry for another week.
Look for smooth, clean husks and firm corms in perfect condition: no spots or discoloration, no bruises. Discard damaged corms.
Large corms bloom better than small corms. Fat, plump corms are better than thin, flat ones.
A two inch plus diameter corm is about the best you can get and will produce a large plant with large flowers, possibly two stems. Corms as small as an inch in diameter should bloom nicely the next year.
Well grown corms can last about five years. A cormel may take several years to reach blooming size. Save the best cormels each year to keep your stock vigorous through an ongoing supply of new blooming size plants.
Pack the corms loosely in paper bags, mesh bags, old nylon stocking toes, in a shallow box or tray, or place on an open rack or shelf.
Store in a dry, dark place with good air circulation.
The corms can be stored at temperatures between 35 and 55 degrees. They must not freeze, but cooler is better, since temperatures below 45 degrees will kill overwintering thrips, a common gladiolus pest. At temperatures above 45 degrees, consider a preventive dusting with carbaryl (Sevin) or a combination fungicide/insecticide as a precaution.
Check periodically for signs of rot (such as Penicillium storage rot or blue mold fungus.) Discard affected corms.
Carefully inspect corms once more before planting. Plant only plump, healthy corms. If in doubt, peek inside the husk to see if it is clean inside.
Benefits of Digging and Storing Gladiolis: Careful sorting and correct storage can help prevent pest and disease problems, increase your stock of favorite gladiolus varieties and even save you money by replanting your own gladioli from year to year.
